Hi in this article I will be showing you how to add custom fonts to your Flutter project
Step 1: Create a project using
flutter create myProjectStep 2: Open the project
Step 3: Navigate to
/lib/main.dartStep 4: Delete all the demo Code
CODE
Step 1: We first need to import the Dart Package
import 'package:flutter/material.dart';Step 2: Add void main
Info: Void returns nothing or null. the main is to tell the flutter app that this the main file.
void main() => runApp(MyApp());Note: It is recommended to insert commas after every parenthesis
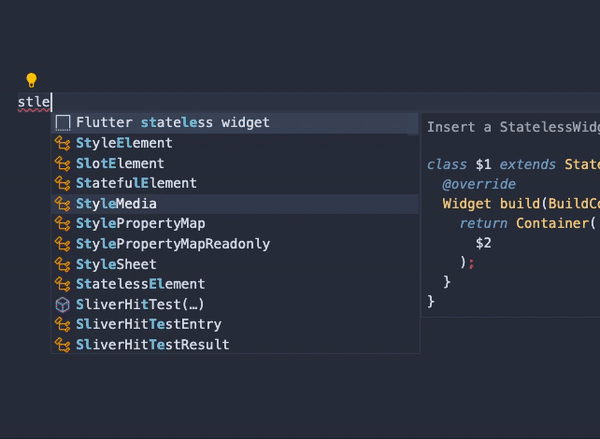
Step 3: Create a Stateless Widget
Tip: type stless and click enter it will automatically create a Stateless Widget
Remove the Container and replace it with a Material App
Step 4: Add a Material App Widget
return MaterialApp();Step 5: Add and Scaffold
home: Scaffold();Step 5: Add an App Bar
Scaffold(
    appBar: AppBar(
        title: Text("Simply Flutter");
    body: Center(
        child:Text("Hi"),
        ),
    ),
);
Step 6: Add text which should have your Custom font
Step 7: Choose your font here
Step 8: Download this font and move it to a new folder in your project directory
Step 9: Step 1: got to
pubspec.yamlfile and go to the last line and you will see something like this:
fonts:
  - family: PermanentMarker
fonts:
- asset: fonts/PermanentMarker-Regular.ttfTESTING YOUR APP
You can use an Emulator or a Physical device
Leave a Reply